Printing chamber
In order to operate, the printing chamber must be assembled correclty. Once a potential is set, the background current should be in the size 0f 0.05-2mA depending on the printing chamber solution, the substrate, printing chamber cleanliness and printing chamber age. Background currents below 0.05mA are indications of bad electrical connections. If the solutions to the problems listed do not work, contact the Exaddon support.
The potential is reached but the background current is 0.
The printing chamber is not wired correctly and one or more elctrodes are not connected properly.
What to do
Check the following items on the list, if one or more are the reason for the low background current.
- Check if the printing chamber solution reaches all the electrodes.
- Check if the printing chamber is closed firm enough to make contact.
- Check if the 3-pin Lemo-plug is inserted correctly into to plug on the stage.
- Remove the printing chamber from the printer, disassemble it and clean it with destilled water and reassmble following the instructions found here.
Check the connections of the plug to the chamber with a potentiometer (for a more detailed description of the connections refer to the Cabling section).
The potential is correct, the approach correct but no voxel is printing.
The substrate is not at potential, therefore after a succesfull approach, the printer can not print any voxels.
What to do
Perform the following steps, after each, chech if the background current has increased significantly (>0.05mA increase). If yes, the printer should be able to start printing.
- Remove and reinsert the substrate into the cell.
- If the substrate looks oxidized or damaged, insert a new substrate.
- Remove the printing chamber from the printer, disassemble it. Check the large carbon piece for contamination anc clean it with destilled water. Reassmble the chamber according to the instructions found here.
Check the connections of the plug to the chamber with a potentiometer (for a more detailed description of the connections refer to the Cabling section).
The potentiostat can not reach the set potential
The potentiostat can not reach the potential set by the user. This means that the printing chamber is short circuited.
What to do
- Check the reference electrode cabling if it is touching the counter or working electrode.
- Remove the printing chamber from the printer, disassemble it and clean it with destilled water and reassmble following the instructions found here.
Check the connections of the plug to the chamber with a potentiometer (for a more detailed description of the connections refer to the Cabling section).
How to test the potentiostat
If the current values are out of range or unstable, the printing chamber is assembled correctly with good connections, it is necessary to test the potentiostat itself. Do this only when told to by the Exaddon Support.
- Unplug the cable from the EMstat 3 potentiostat.
- Plug the testing cable into the potentiostat.
- Attach the crocodile clamps to the testing cell as shown. Make sure the contacts are good and clamped correctly.
- Open PStrace 5. Switch to the tab “Manual Control”.
- Load Method “PSNoiseTest.psmethod” via the method dropdown menu. The file should be located in the users’ local files in a folder called PSdata.
- Start the measurement with the preset settings.
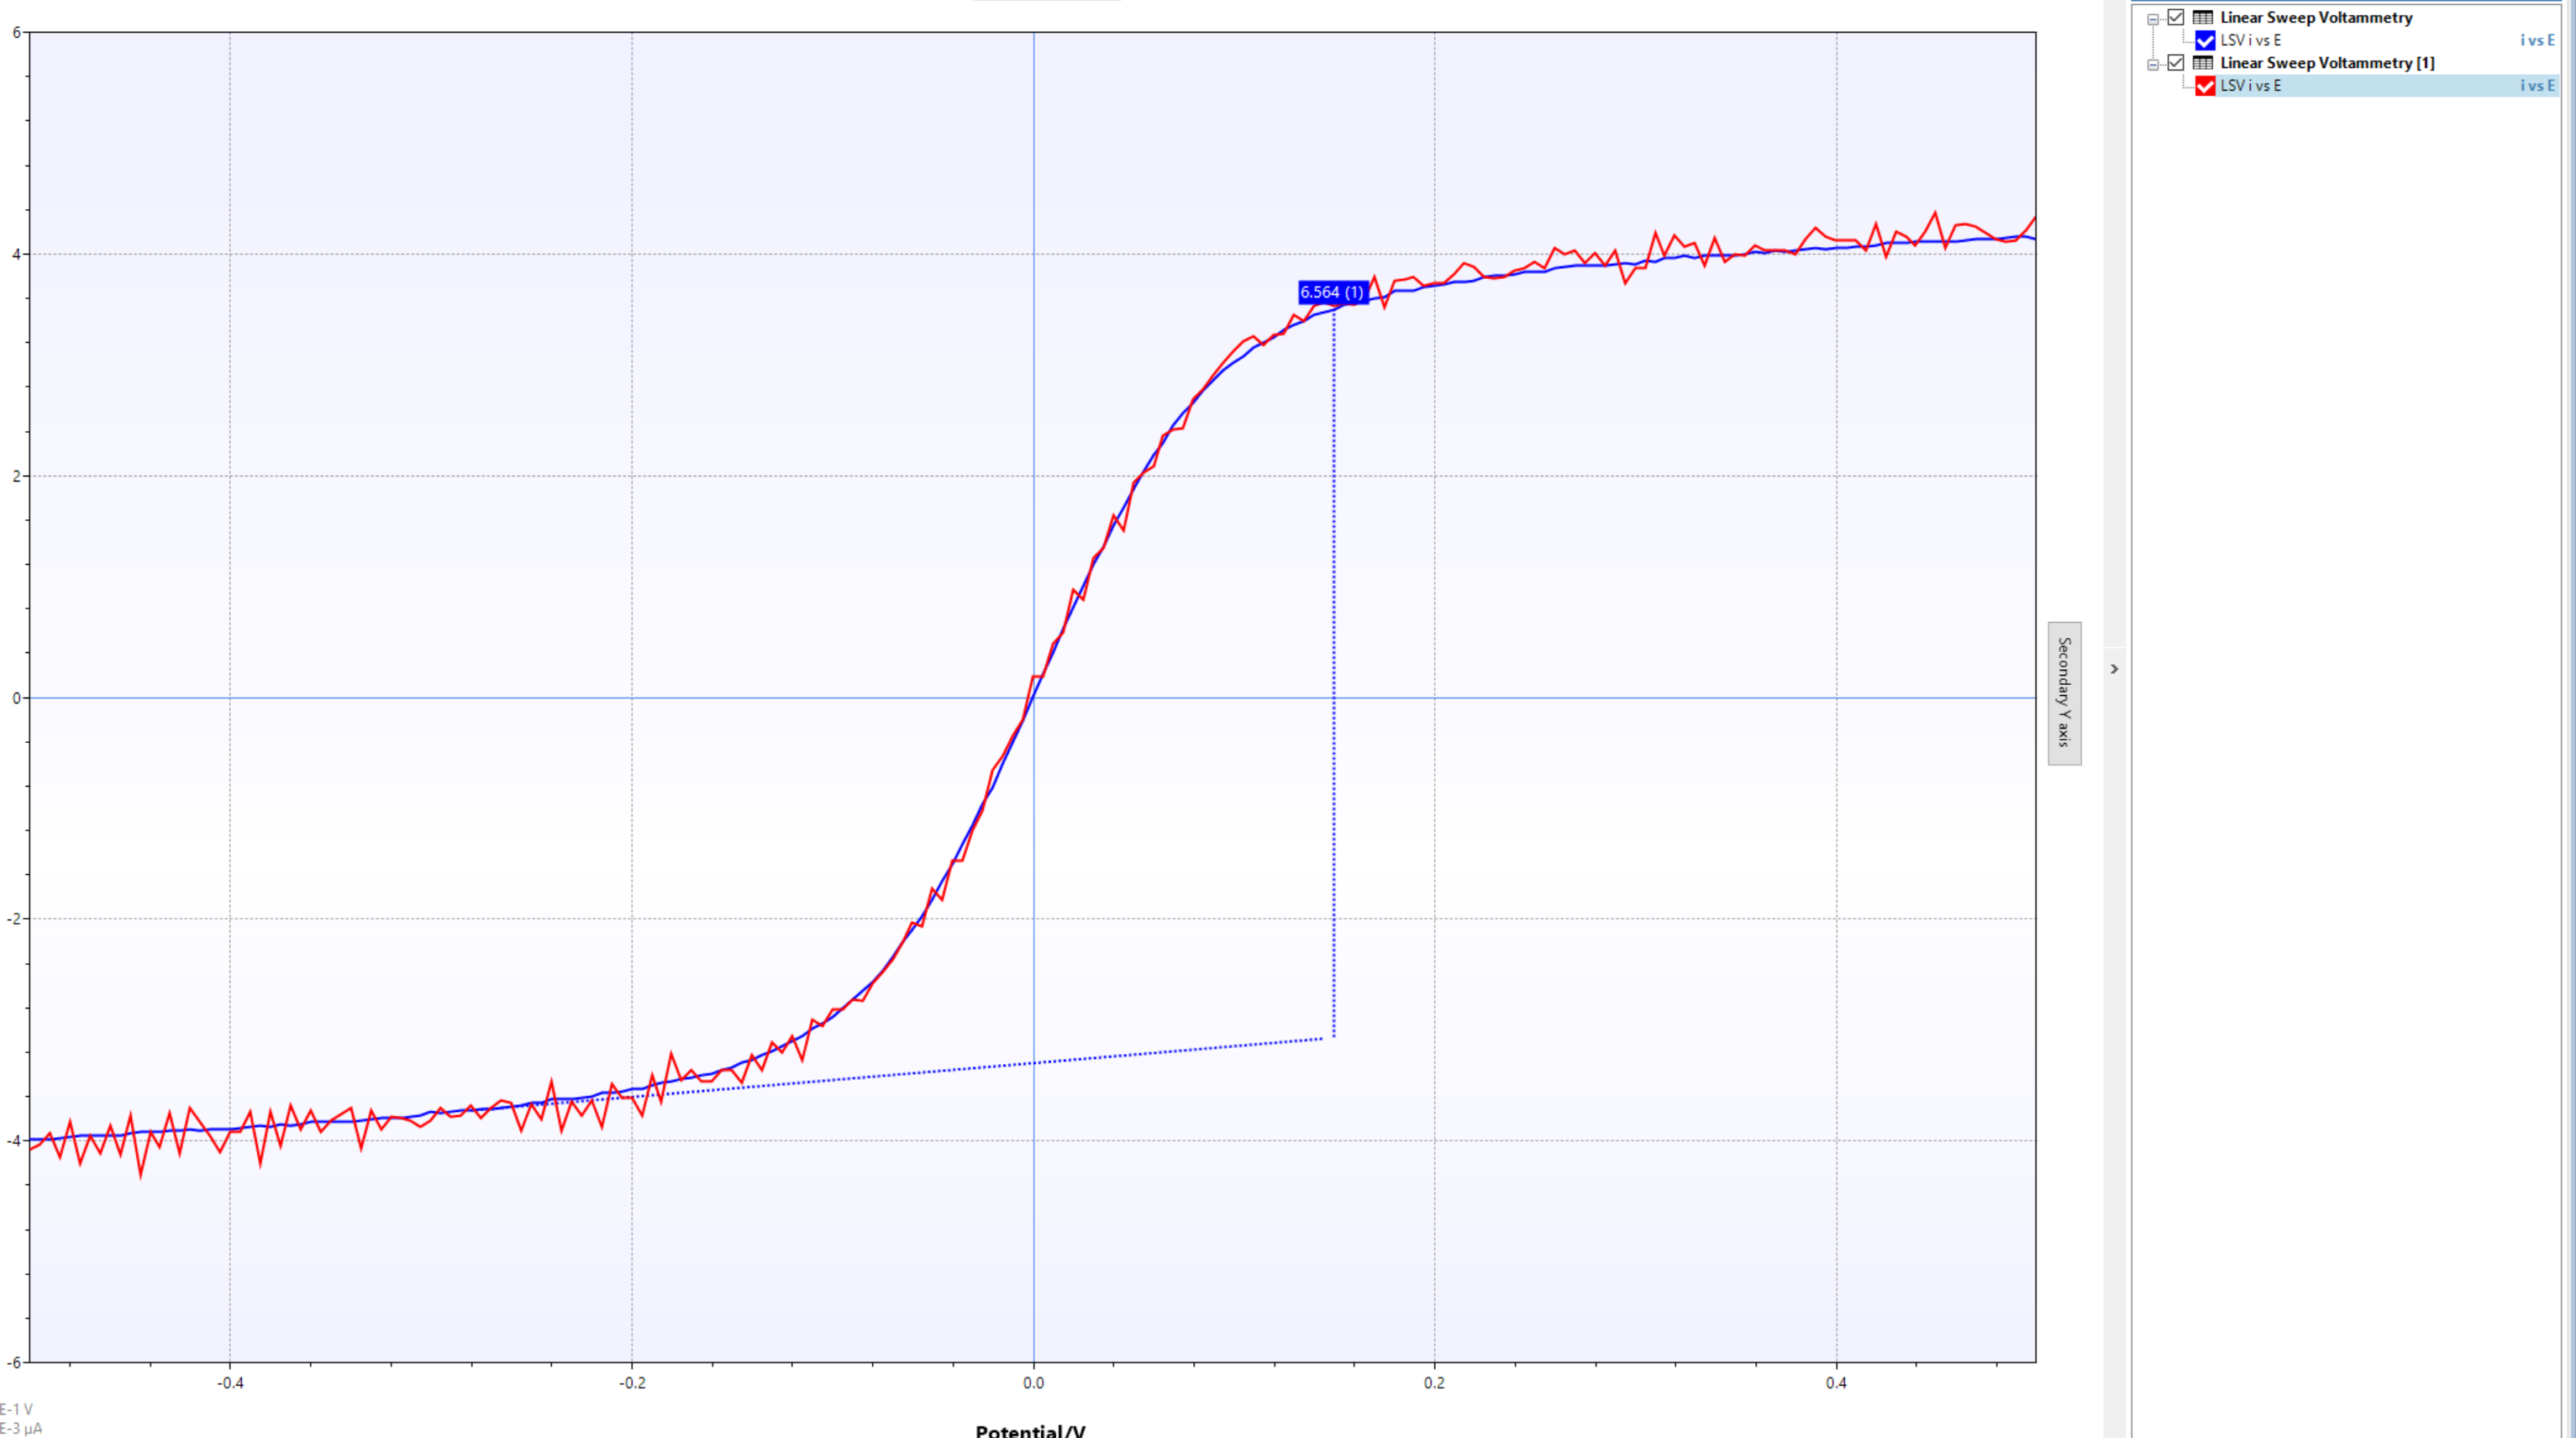
- Repeat the measurement by changing the sampling rate to 0.05V/s.
- If the noise level is significantly higher than shown in the figure below, contact the Exaddon support with the recorded data.
If the potentiostat is working correctly, perform a cyclic voltammetry measurement with the supporting electrolyte. Make sure the cell is clean, the graphite pieces of the cell were soaked in DI-Water for at least 1h and dried properly. This test will show if the chamber solution is contaminated or the electrode is in poor condition.
- Install the printing chamber in the CERES system and connect the lemo plugs.
- Put a gold substrate into the chamber.
- Fill the chamber with supporting electrolyte (10ml).
- Open PStrace 5.
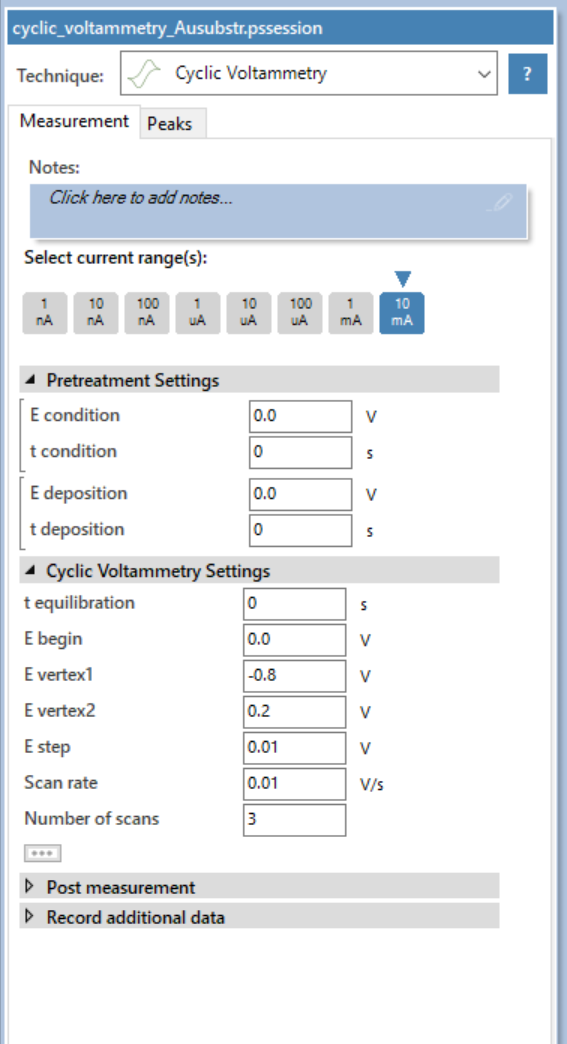
- Choose the option cyclic voltammetry measurement with the parameters shown below.
- Record 3 cycles and compare to the measurement shown here.
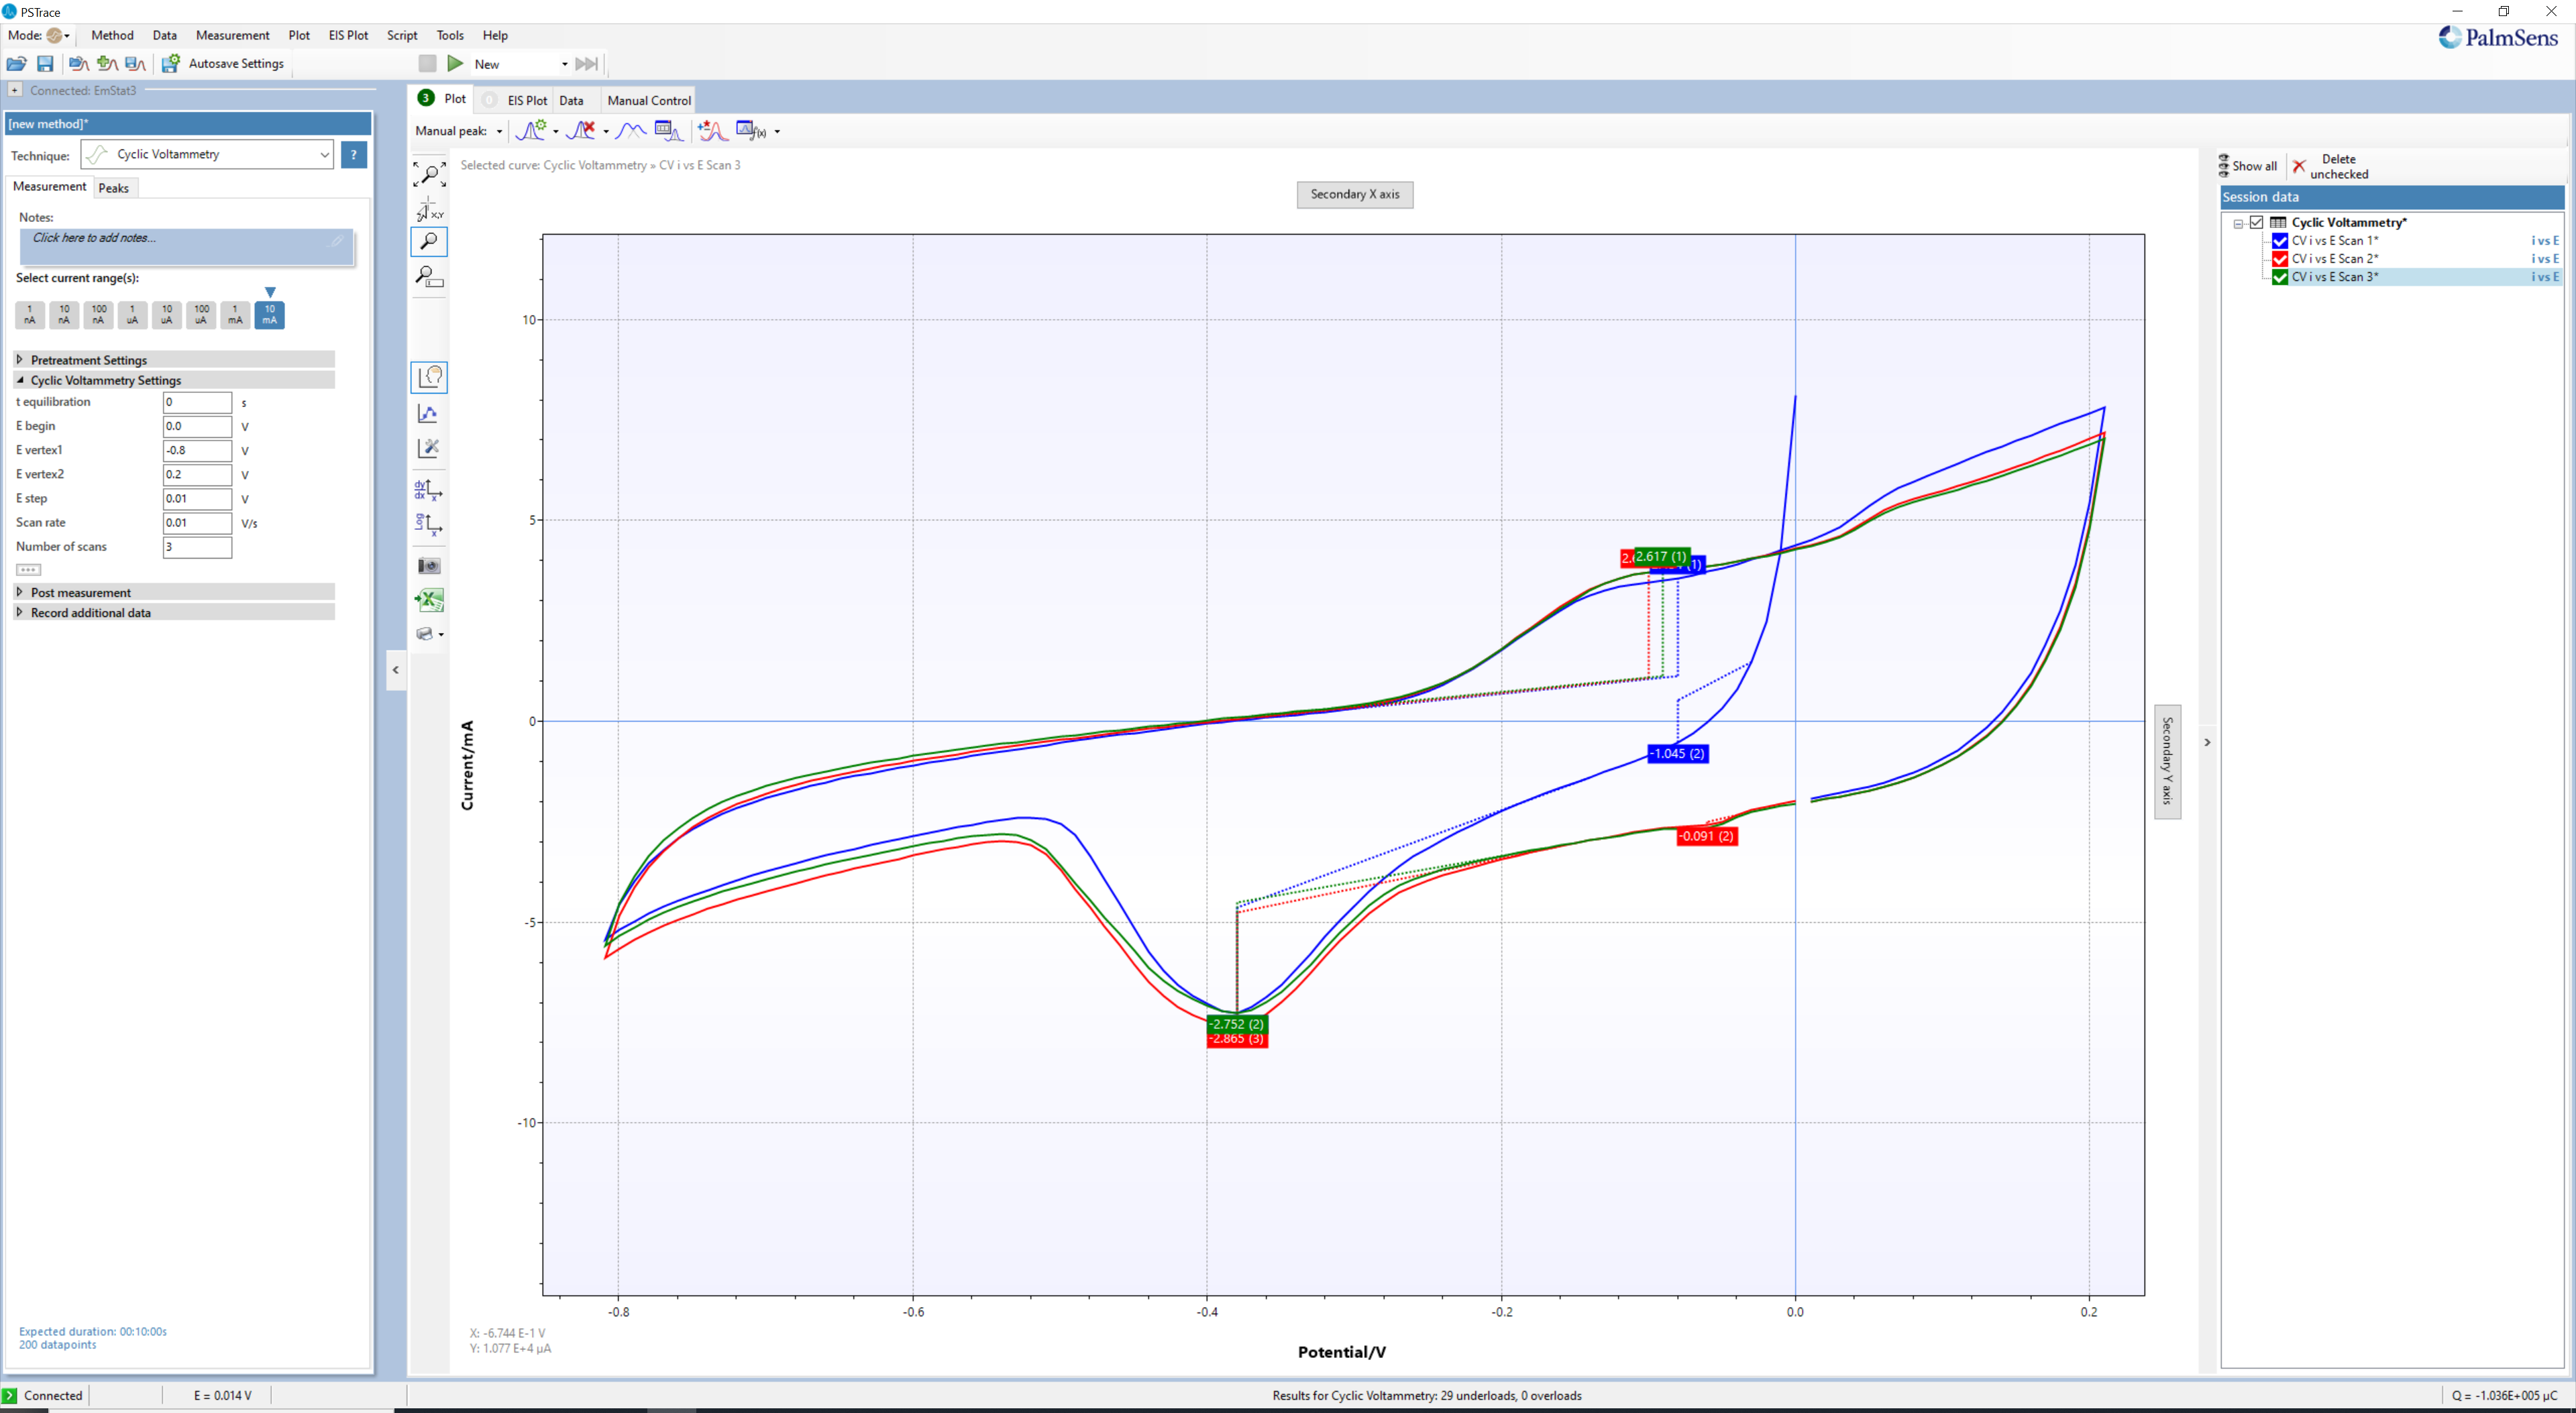
If this does not match the comparison, clean the cell and use new supporting electrolyte. If the issue persists, please contact Exaddon support with the resulting CVs.