Printing
Prints stop before reaching completion
Most causes for a print failure can be identified trough analysis of the deflection and voxel time curves of the printfile with the LogViewer application. The main causes for print failure are listed below.
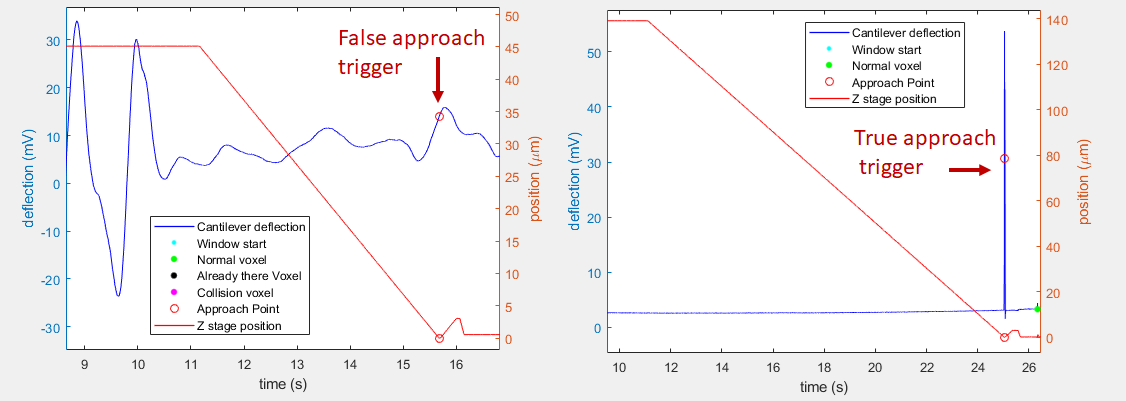
False approach
Large oscillations in the signal can be mistaken as substrate signal by the system. When this happens, the system starts the print at the wrong height, above the true substrate level.
See an example of false approach (left) and true approach (right) below
What to do
- Try printing the same file one more time
- Move to a different location on the substrate
- Raise the approach detection threshold (5 mV increments)
- Clean the tip by immersing it in ethanol or isopropanol for 30 seconds
No voxels are printed after approach
If the tip is flowing and the approach correctly detected, the substrate might not be at the correct potential. Refer to the printing chamber troubleshooting.
False detections of voxels
Wrongly detected voxels may lead the tip far from any printable surface.
False detections can happen due to several reasons: substrate interference, stage movement, large pressure differences applied, noise or drift in the base signal.
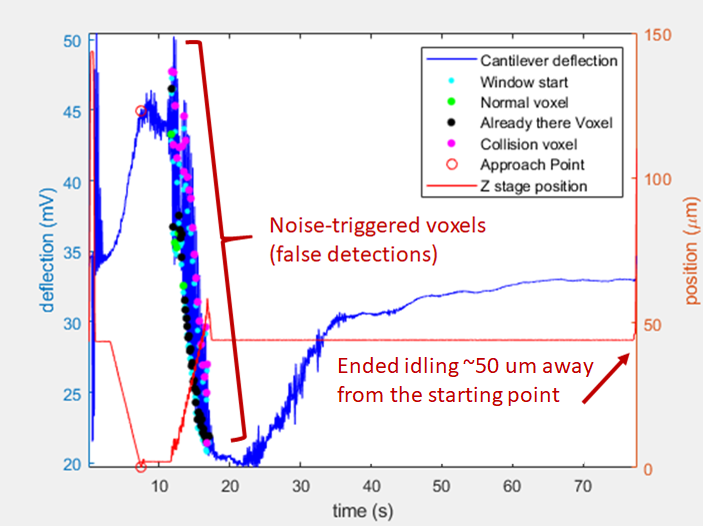
Signal noise causes false voxel detections
 Optical interference is another common cause for skipping voxels
How to spot false voxels
Differently to normally printed voxels, false voxels are very fast and occurr in rapid succession. For this reason they are often recognised in the LogViewer and shown as pink or black points.
What to do
- Move the laser spot 10 μm downwards on the cantilever
- Move to a different location on the substrate
- Clean the tip by immersing it in ethanol or isopropanol for 30 seconds
- Properly clean the substrate to avoid contamination of the tip
- Exchange tip to a new one
Iontip clogged
This can occur because of particles in the ink aggregating at the aperture or because material deposited and closed the aperture.
How to spot a clogged probe
The quickest check to spot a clogged probe is compare the deflection signal with the applied pressure as shown below.
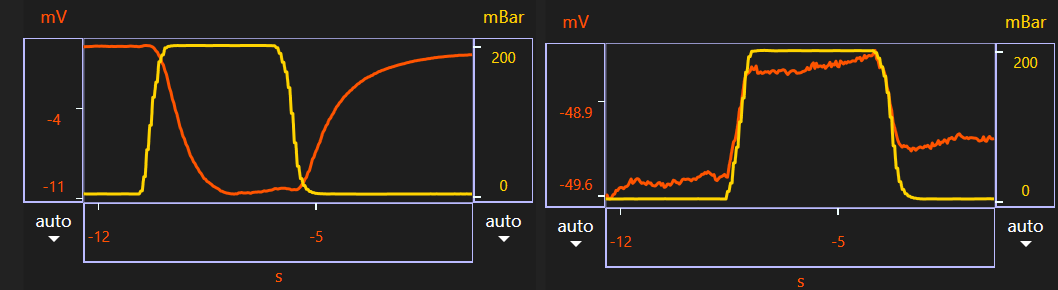 Left: normal flow. Right: clogged tip.
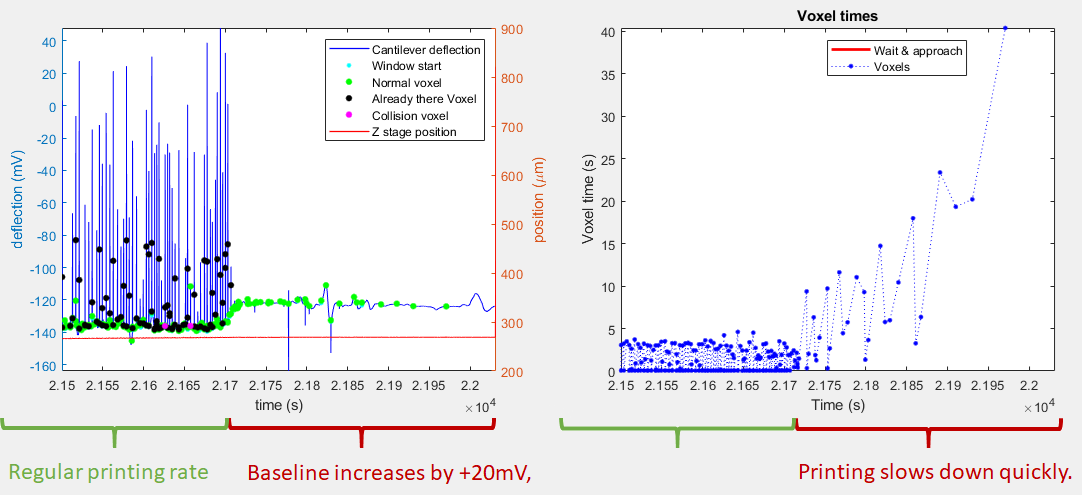
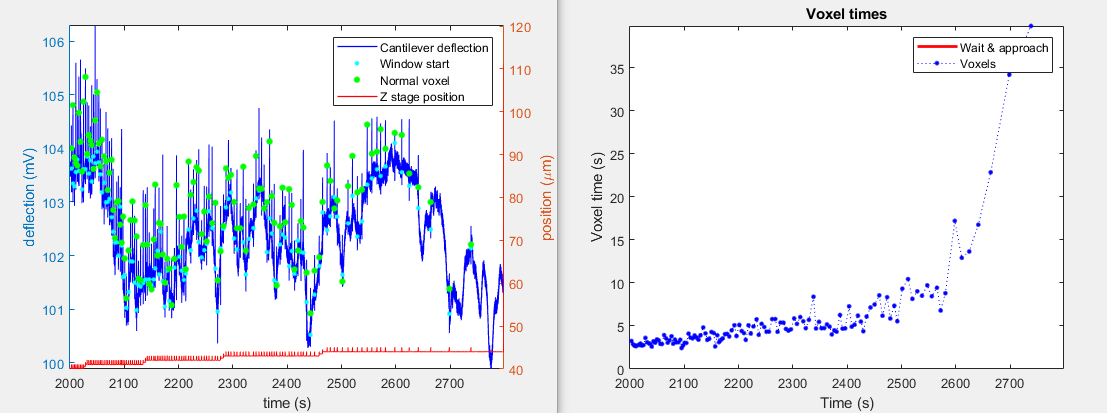
Clogging can be seen also in the log files. In the example below, the voxel time is increasing over time. The quick increase in voxel time is accompanied by an increase in the baseline level, indicating a sudden loss in flow. Note this is not seen in example 2 as the pressure used was small (40 mbar vs 300 mbar for example 1):
Info
Clogging can be caused by the design of the structure as well. For example, large overhanging structures can be unstable and increase the chance of clogging.
What to do
- Insert the tip in the chamber solution and apply pressure for some minutes
- Alternatively, insert the tip in isopropanol or ethanol for some minutes
- Exchange to a new probe
- If clogging occurs always in the same area of the design, check your printfile
The reservoir of the consumable emptied
This is a rare occurence, but symptoms are similar to a clogging tip since the ink flow decreases when the reservoir empties.