Stage maintenance
The system has to be regularly serviced, in particular the X, Y and Z stages need to be cleaned and lubricated to assure performance and reliability:
-
The cleaning and oiling procedure should take place 2 times a year.
-
Rail lubrication should be run monthly to evenly distribute the lubricant on the rails.
Important
These instructions are intended for Exaddon trained personnel and experienced users.
Cleaning and maintenance kit
The cleaning and maintenance kit is composed to satisfy the high requirements a nanometer-positioning system poses. Warranty will be forfeit if other cleaning tools and lubricants are used with the system.
Content
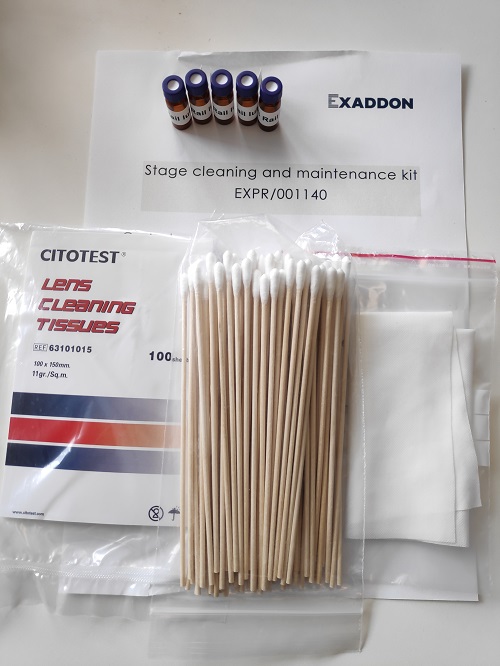
The cleaning and maintenance kit for Exaddon systems contains:
- 5*2mL bottles of stage lubricant oil
- 100 cotton swabs
- 100 Optical-grade cleaning wipes
- 1 cleaning cloth
This is enough for 5 full maintenance interventions on a single system (~2.5 years).
Preparation
Follow the following steps before starting the cleaning:
- All plates are removed from the system.
- Ensure a probe is gripped to protect the nose and the prism.
- The software is closed.
- The pressure controller and system controller are powered off.
Cleaning
Optional
Before cleaning the oil, it is possible to dust the whole system with dry air.
Warning!
Be careful not to touch, damage or stain the glass rulers close to the rails during the whole cleaning and oiling process of the rails.
Note
Wipes or swabs must be used gently, without applying much force to not damage or strain any component.
Cleaning the XY stage
-
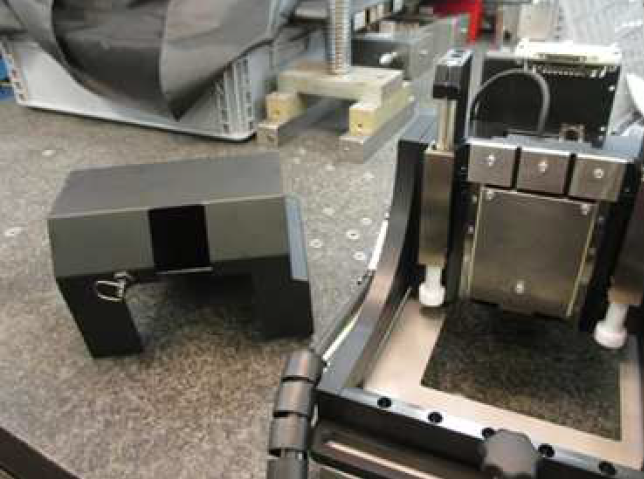
Unscrew and remove the Z stage from the system and screw it on the storing base, to make sure the probe does not touch anything.
-
Cover the bottom and top camera’s end lenses with the provided caps.
-
Remove covers to access the rails more easily. There are three parts to remove:
- The left cover panel. Loosening the screws is enough to slide the cover out.
- The right cover panel. Loosening the screws is enough to slide the cover out.
-
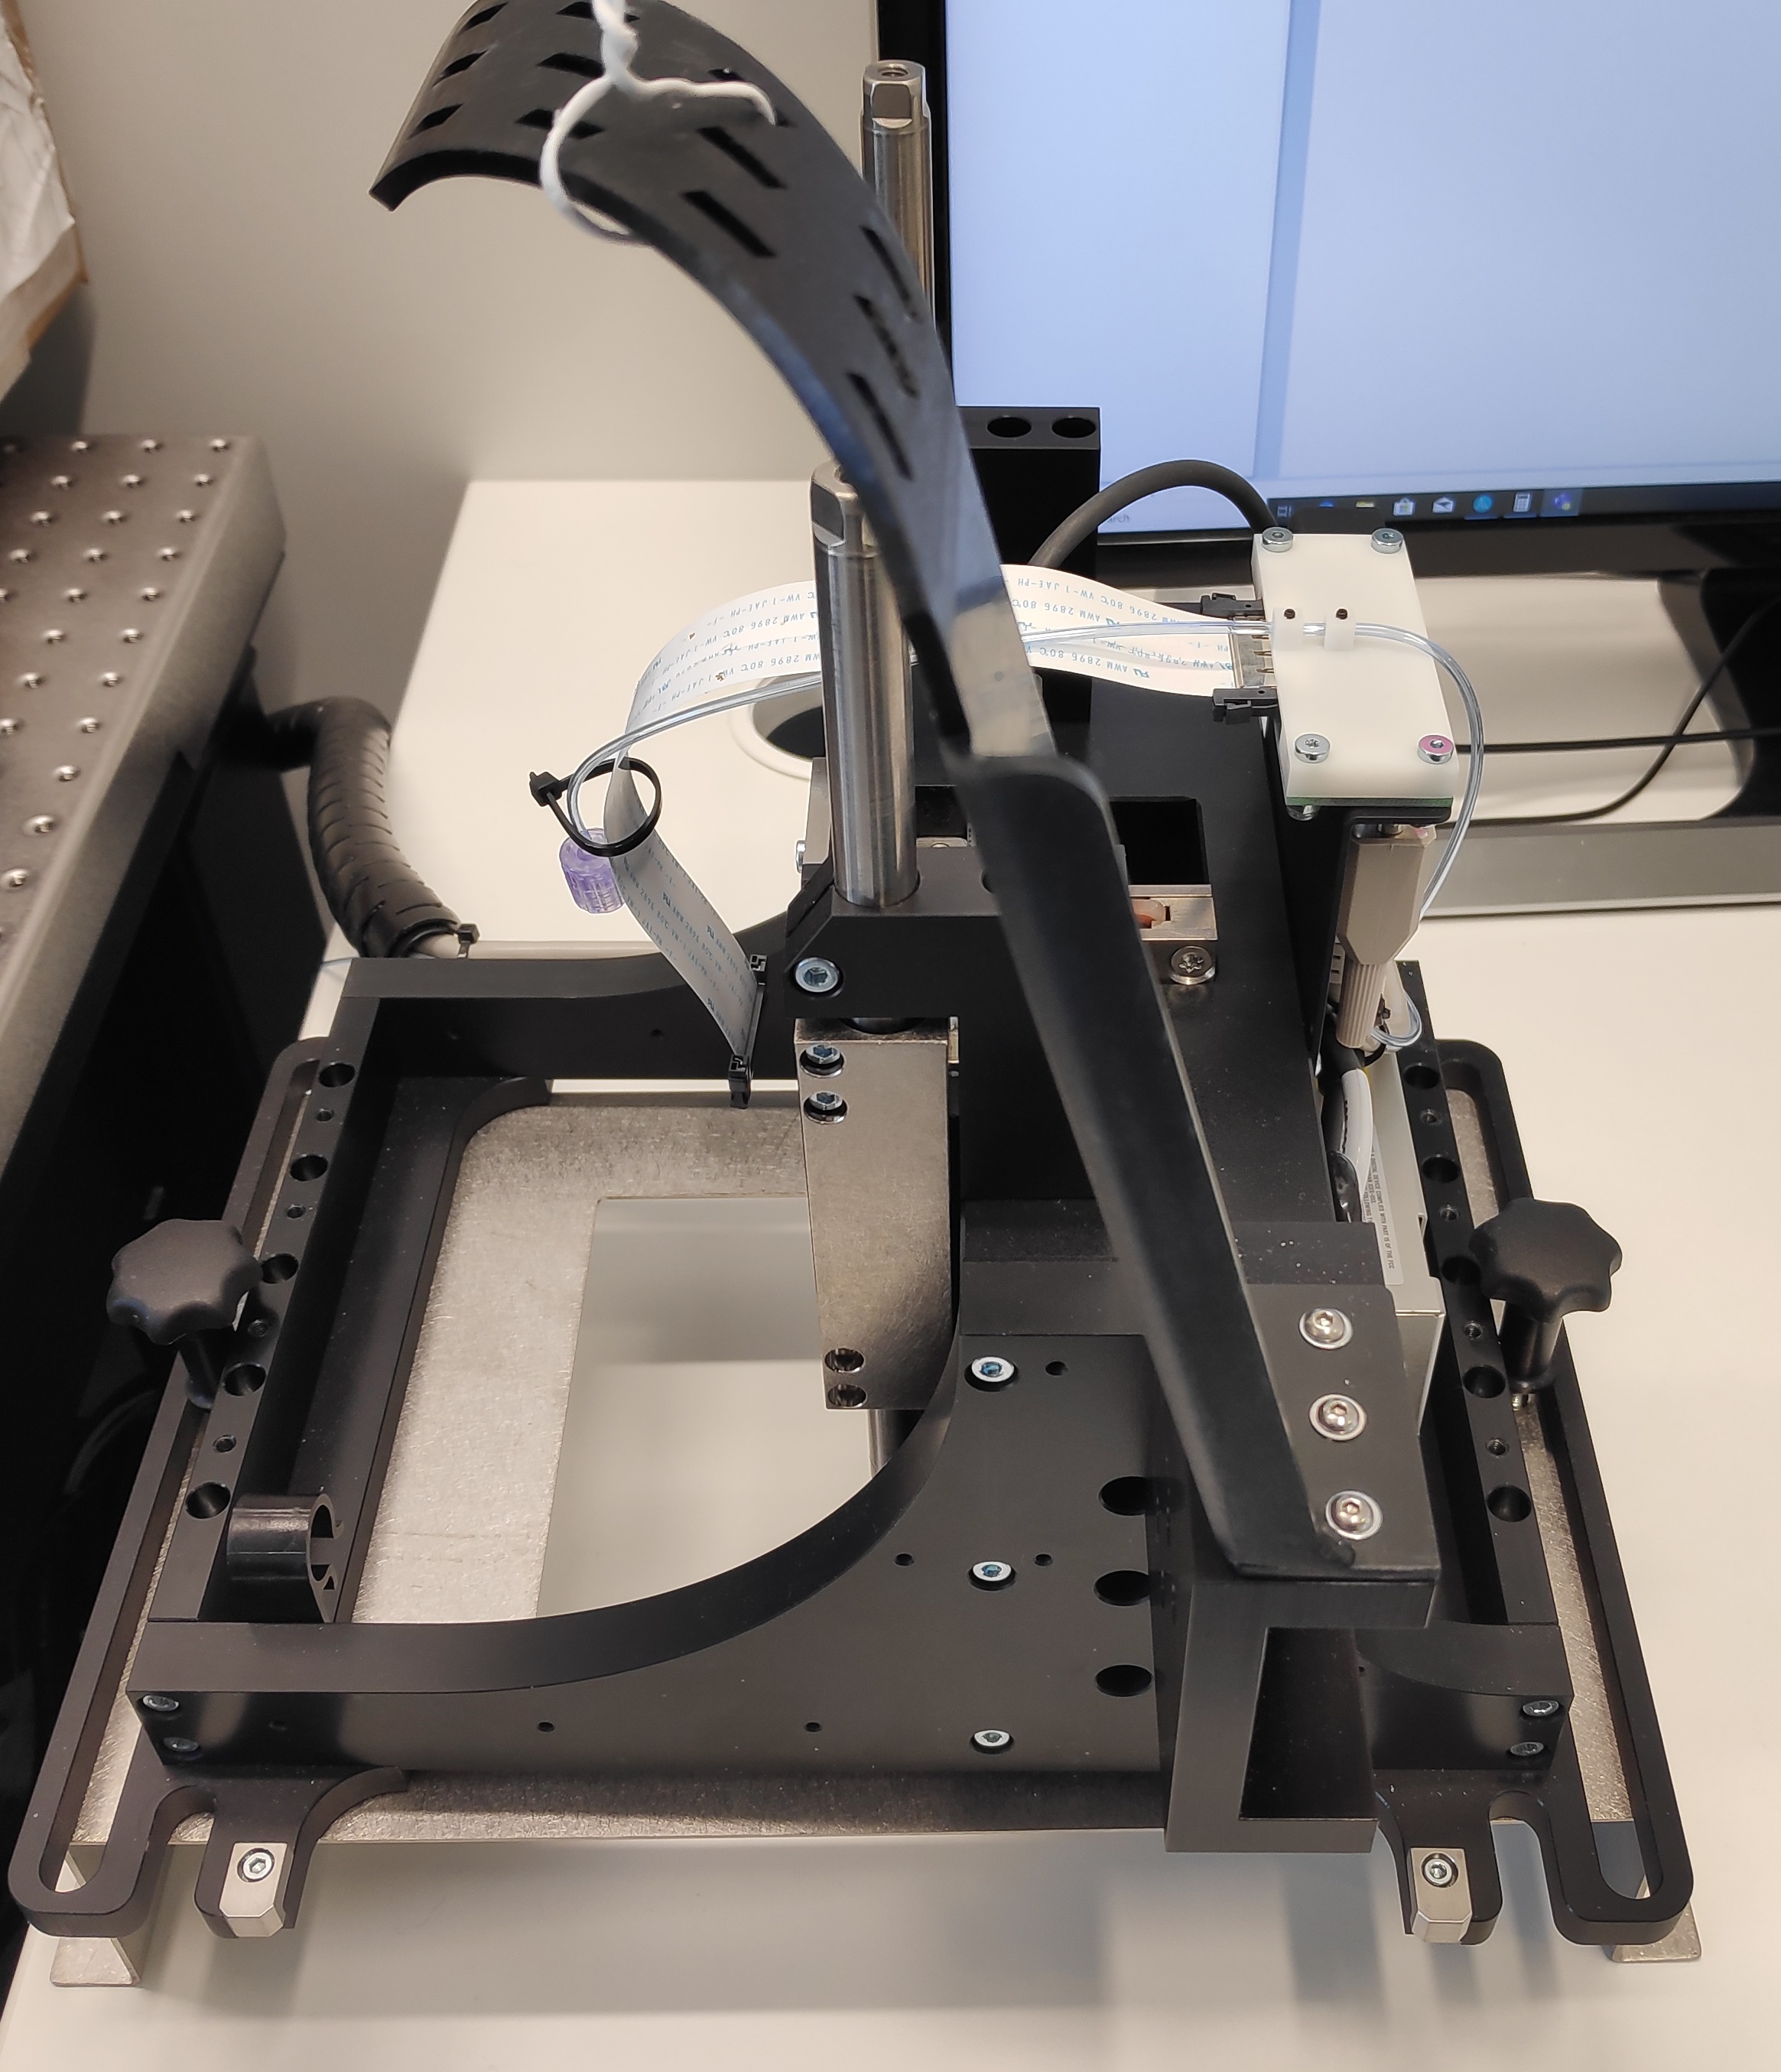
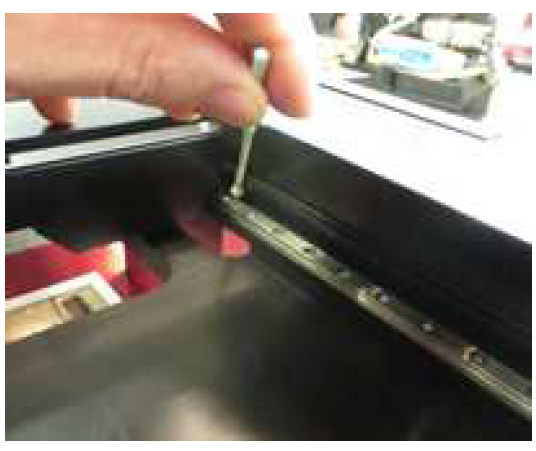
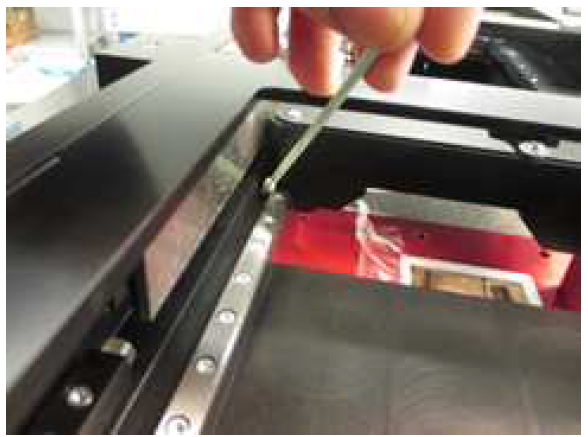
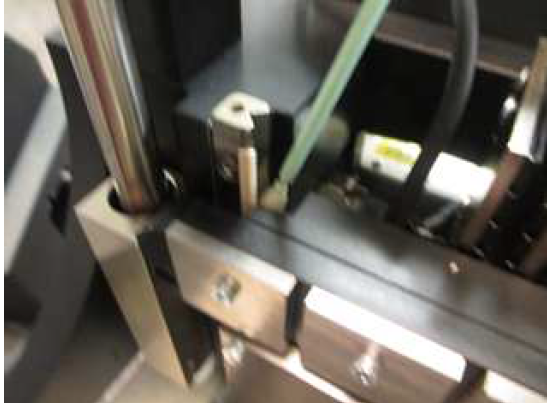
The Y stage cover is to unscrew as indicated below:

-
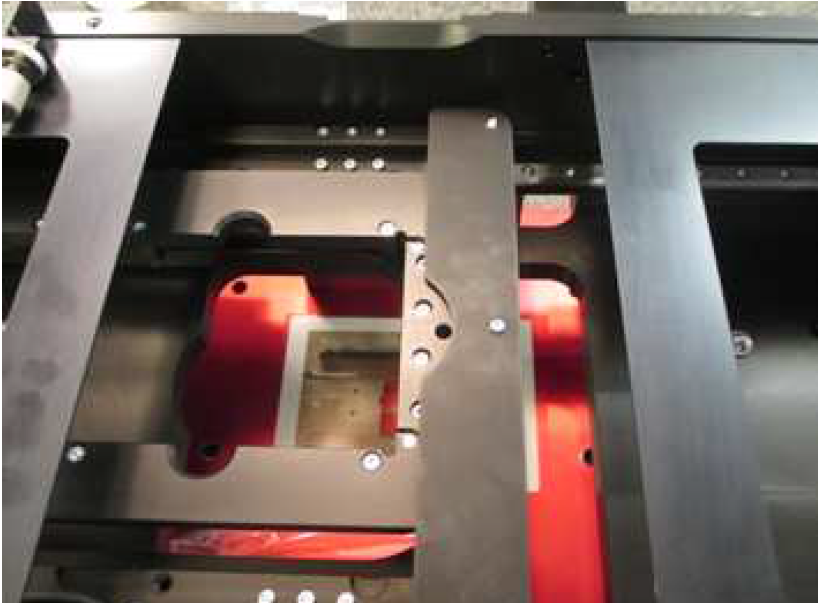
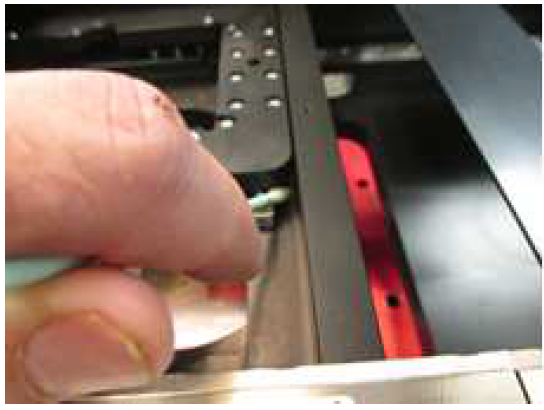
There are two rails for the X axis (in red) and two rails for the Y axis (hidden below the covers on each side of the stage pictured in green below).

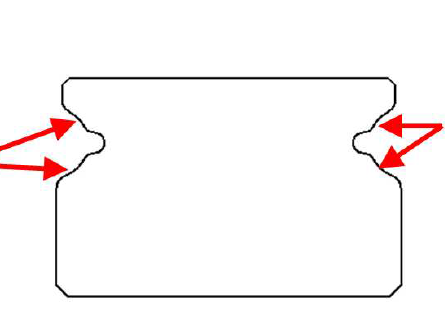
Each rail has a V-shaped cross-section, see below. Clean the yellow colored sides on the pictures thoroughly without applying force using the swabs. Do not use any liquids for the cleaning.

Cleaning the Z stage
The Z stage must be removed from the system and screwed to its storage base before performing the following steps.
- Remove the head from the Z stage.
-
Remove the cover of the Z stage:
- Loosen all screws.
-
Slide off the cover vertically.
-
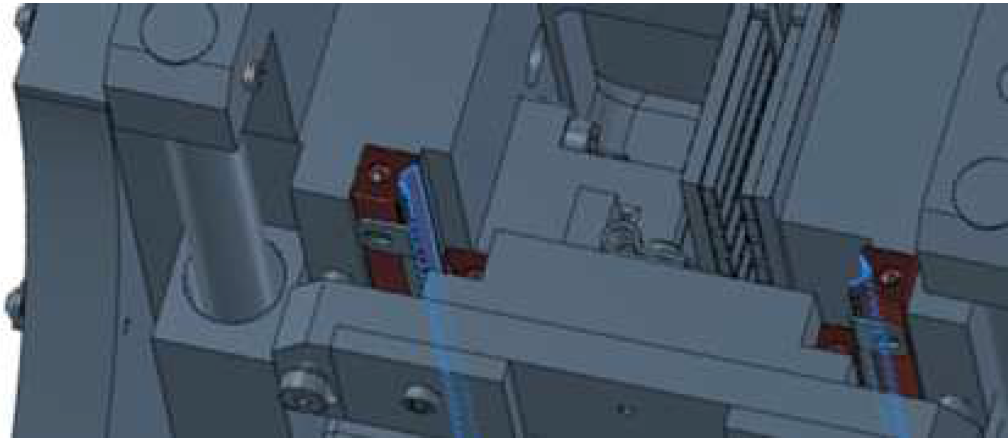
There are four rails, indicated in red in the image below, and central piece slides in-between them along the V-shaped surfaces (in blue below). Clean old dust and lubricant from them. The Z stage can be moved to acess rails from above or below.
Oiling
Once the stages have been cleaned, lubricant oil provided with the cleaning and maintenance kit is applied to all rails with swabs. 1 bottle of 2mL provided in the cleaning kit contains the needded oil quantity to lubricate all the rails.
Applying lubricant to X stage
-
Position the X stage to the very left, as shown below.
-
With cotton swabs, apply 100 µl per accessible surface.
-
Move the X stage to the very right. Repeat the oiling on this side (step 2).
Applying lubricant to Y stage
- Move the Y stage to the uppermost position.
-
With swabs, apply 50 µl lubricant oil per accessible surface.

-
Move the Y stage to the lowermost position and repeat the oiling (step 2).
- Screw the Y stage cover back.
- Mount the left and right covers again.
Applying lubricant to Z stage
- The Z stage has four rails, facing each other two by two. Apply the lubricant oil with a cotton swab on both of them and use 100 µl per rail.
-
Move the Z stage to the lowermost position and lubricate the accessible surfaces of the rails.
-
Then move the Z stage to the uppermost position and apply the same amount of lubricant on the now accessible surfaces.
- Place and screw the cover again on the Z stage.
(optional) Cleaning the optics and optic ruler
Over time, the optics of the bottom and top camera’s and the optic ruler of the X-Axis can get stained with dust or droplets of liquids. In those cases, a cleaning should be performed during stage maintenance as optics are easily accessible but after the lubrication steps.
Warning
- Never use dry wipes on optics
- Use dry air or Nitrogen to remove dust before performing any other cleaning steps
- Do not apply force when wiping optical surfaces
- Use only optical-grade wipes provided with the cleaning kit to not damage the surface of the optics.
- Fold the wipe twice and wet them with a 50% IPA / 50% ethanol mix. A cotton swab can also be used to fold the wipe around and access better the optics edges.
- For the camera optics, start from the center to the edges in a slow and continuous spiraling movement.
- For the optical ruler, wipe in a straight, slow and continuous movement and go to the end of the ruler.
- IPA may leave drying marks on the optics. In that case, start again and wet less the wipe.
Assembly
Once all parts have been cleaned and oiled, the system can be reassembled.
- Remove the caps from the optics.
- Assemble the Z stage again correctly onto the XY stage.
- Mount, screw and connect the head and its cables back on the Z stage.
- Power both pressure and system controllers on. Wait for the complete booting of all components (1 min).
- Start the software and let the system initialize itself.
Rail lubrication
Each month or after oiling, the applied lubricant oil needs to be evenly distributed on the axis to ensure long term functionality.
Prerequisites
- Head is mounted
- No plates are installed
Danger!
The system needs to move along the full X, Y and Z accessible range. Remove all plates from the system before running the lubrication workflow.
Process
- Enable the Maintenance mode
- Run the dedicated
Rail Lubricationworkflow. - The head begins to repeatedly move up and down, pausing after reaching the upper or lower limit.
- After 5 minutes, the stage begins to repeatedly move along its X and Y axes, pausing after reaching an axis limit.
- Steps 3 and 4 are repeated for 60 minutes until the lubrication is completed.
Calibration
As the axes have been moved and the Z stage has been disassembled, the following calibration workflows must be run to realign the components of the system:
Calibrate XY (Head)Calibrate XY (Stage)Calibrate Z (Height)Align Camerafor the top cameraMeasure Top Camera Offset
Once the calibration is completed, the system is ready to be used again.